How do I Manage Designs in the Design Gallery?
In this article, you will learn how to manage your designs located in the Design Gallery in our cloud-based digital signage software, Mvix CMS. The Design Gallery holds a myriad of signage templates that will be published on your device. When you want to create a new design for your signage, this is where it will be created. There are a lot of editing tools featured in the Design Gallery such as:
- Font Text Styles
- Stock Images
- Stock Shapes, Objects, and Emojis
- Stock Icons
- Editing Background Color
- Editing Background Images
- Editing Background Patterns
- Editing The Canvas Settings
Templates for Every Market
In our Design Gallery, our team has curated customizable templates for every market to display on their digital signage. the Design Gallery is the central place to add your brand aesthetic and tailor the template to your liking. Interested in what designs are pre-made? Here are use cases for some of our markets:
- Corporate Businesses: template designs for breakrooms, digital directories, meeting rooms, menu boards and emergencies
- Healthcare Facilities: templates for waiting room signs and patient communication
- Educational Institutions: templates for school communications, classroom teaching materials and cafeteria menu boards
- Restaurants: digital menu board templates to enhance your menu
- and more!
What You’ll Need:
- A compatible digital signage player e.g. Mvix, BrightSign, etc.
- Mvix CMS Software with a supported feature package
- Internet Connectivity
Video Tutorial
Creating a Design
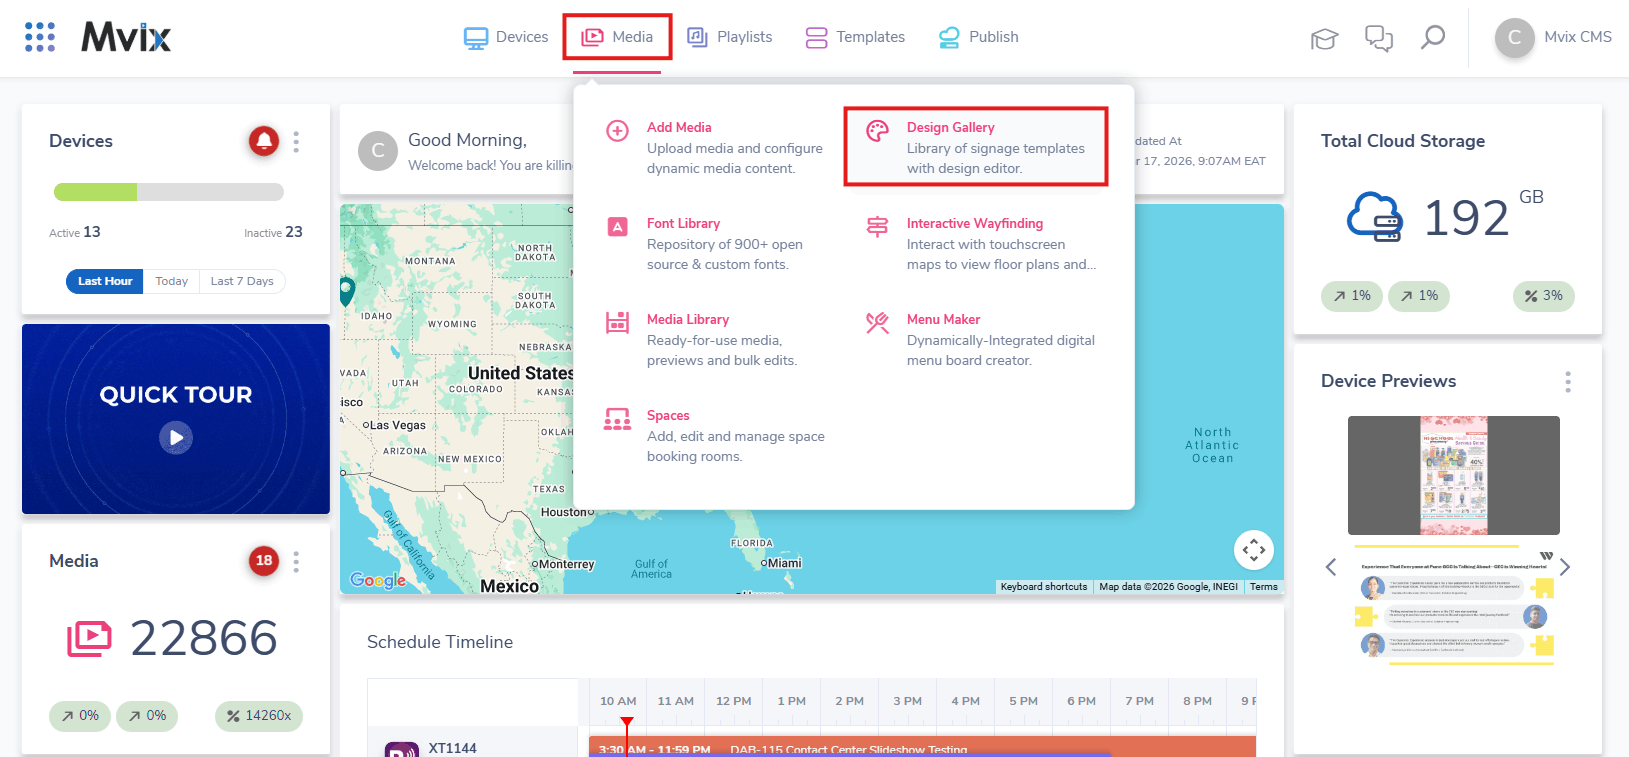
- Hover over the “MEDIA” tab, and click ” DESIGN GALLERY”.

- The Design Editor will appear where you can create and edit your templates. There are two options to create a design for your digital signage: using Stock Design in the Design Library and creating a design
from scratch. - Let's go through an overview of each feature in the Design Library and how you can manage your designs.
Design Library

- Starting on the left, the first icon is the "DESIGN LIBRARY", which houses stock designs for your digital signage. Under "DESIGN LIBRARY" is "SHARED WITH YOU" and "CREATED BY YOU", which show designs that have been shared with you through other Mvix CMS accounts and designs created by you on the Design Editor. If you are not creating your design by scratch, this is where you will find pre-made templates to use.
- You can also Search Designs in the search bar by use cases, like food, corporate, hotel, and more.
- Click the "UPLOAD" icon to upload a layered Photoshop file
- Click the "SETTINGS" icon to change the design to landscape or portrait.
Fonts/Text Styles
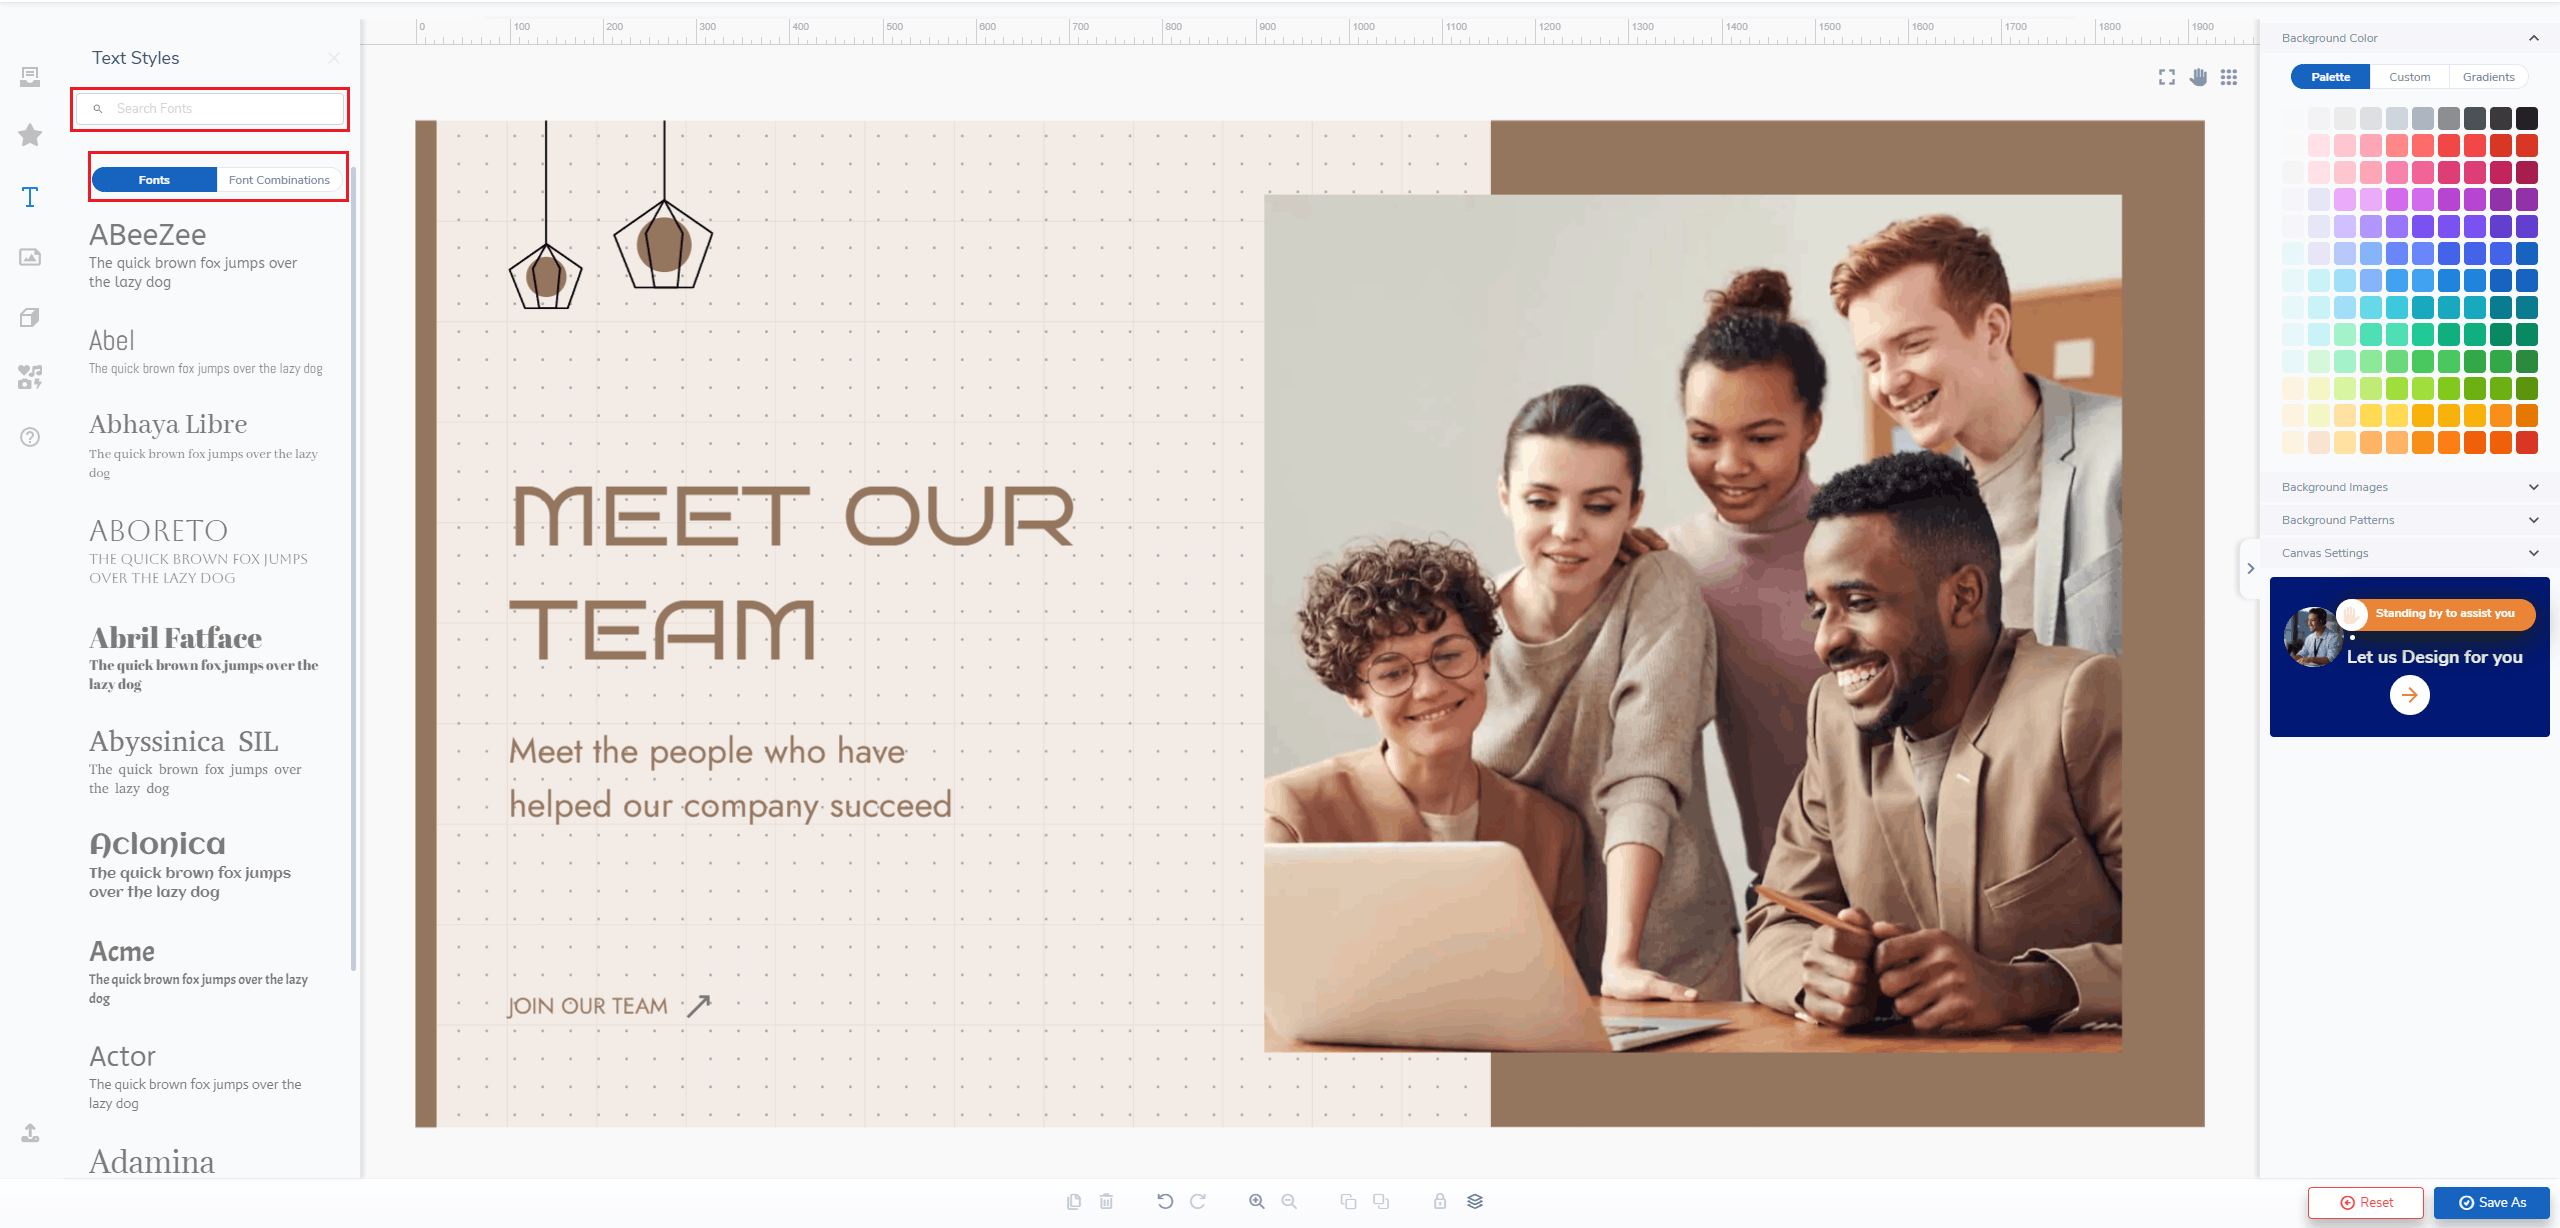
- Click the "FONTS" icon under the "DESIGN LIBRARY" to add text to your template. Under "FONTS", drag and drop which Font style types you would like to use in your template.
- Under "FONT COMBINATION", add text styles that incorporate more than one font style.
- If you're not finding the font style you're looking for or want fast searching, use the "SEARCH FONTS" bar to type in the font name for easy accessing.
When selecting a Text on the Design Gallery, you'll see a collection of categories appear on the right. These allow you to customize the Text with the following options:
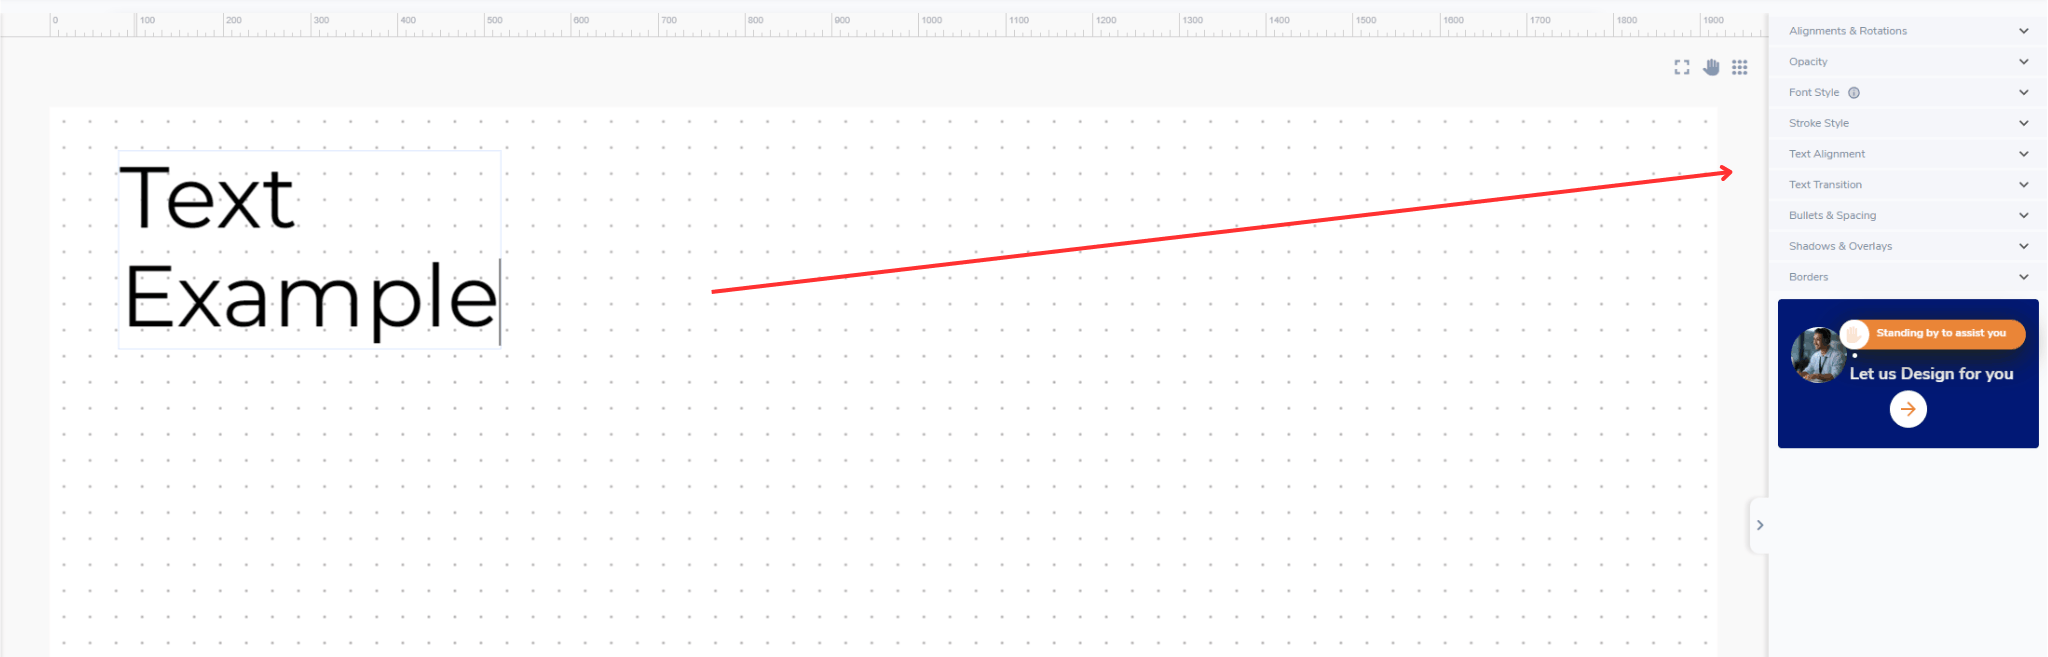
- Alignments & Rotations
- Manually adjust the alignment (on the design gallery canvas itself) of your text block, left/right rotation, or spacing.
- Opacity
- Control the transparency of the text.
- Font Style
- Adjust the color, font style, typography, or padding.
- Text Alignment
- Control the alignment within the text block itself.
- Text Transition
- Add in a directional transition effect and control the speed at which the animation progresses.
- Bullets & Spacing
- Either convert or add bullets/numbers to the text box. Line spacing is also controlled here.
- Shadows & Overlays
- Add in shadow/overlay drop effects and colors.
- Borders
- Control the text border weight, radius, color, and style.
Images
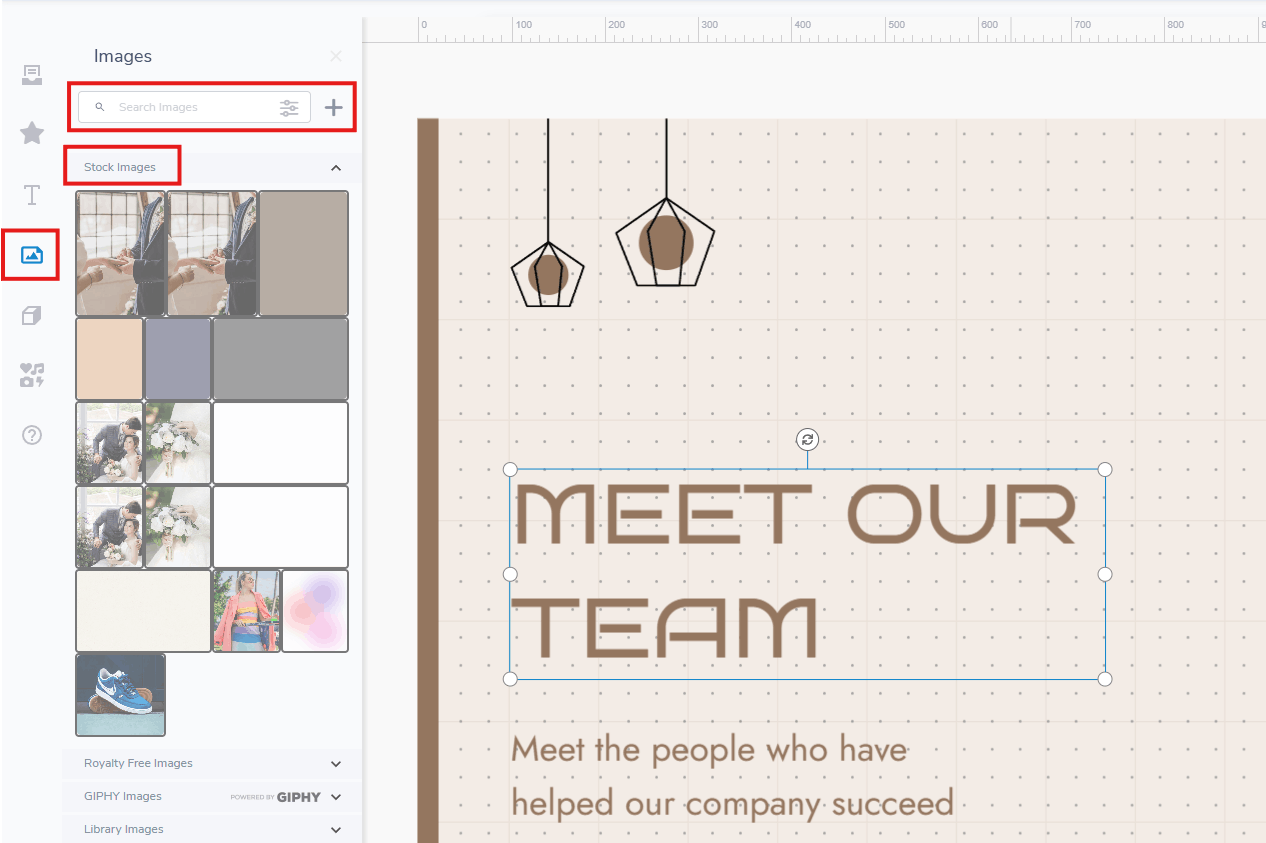
- Selecting the Image menu will allow you access to our Stock Images, as well as any you have uploaded under the Library Images dropdown. These can also be dragged or simply clicked to be applied at their base resolution, and adjusted to your preference.
- If you are creating a design from scratch, add your various images to your Media Library first before design. After adding your images to the Media Library, add them to your design in the Design Editor by clicking the + icon and importing your designs
- In your template editor window, you can access the sidebar of settings on the right. These sections make up the editing tools that you’ll be using to adjust your template. You can adjust various settings for your Text and Images, depending on which type of Zone you have selected.
- Text Zone Settings allow adjustment of fonts, sizing, rotation, color, movement, spacing, etc. Image-based zones allow for cropping, rotations, filters, etc.
Editing Layers

- The toolbar below your Design houses the remaining controls like undoing, Copy or Delete, or managing Layer levels.
- Once you’ve highlighted a layer, you can create a copy of it by clicking the “Copy” button. Or, remove the layer by clicking “Delete”. You can also zoom in or zoom out, and optionally un-do or re-do any action performed.
- Lastly, don’t forget to SAVE. Saving your Design will add it to your Design Gallery and allow you to keep it for further management, or deployment to your player/display.
Editing a Saved Design
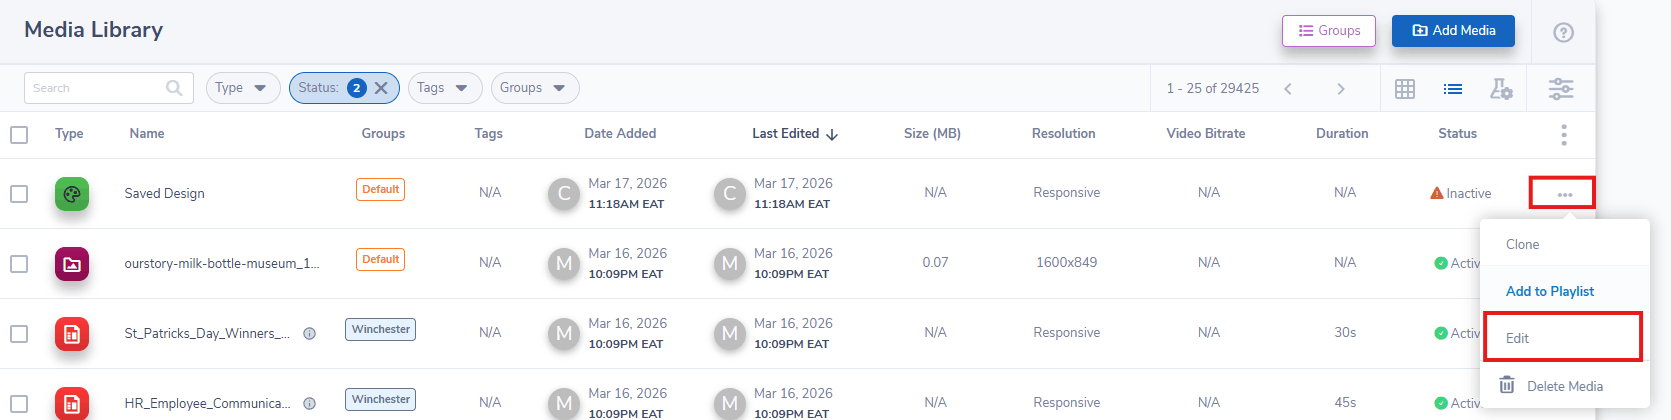
- You can edit any existing Designs you may have saved previously in the Media Library.
- Editing a design will open the same editor we used to initially create the Design, and the controls are the same between either version. The only difference is where to access the existing Design.