What is a static IP? Do you need to set one up to use your Mvix device? The Mvix device has a built-in WiFi adapter, which allows you to connect to any type of network. While Mvix, by default, is configured to DHCP, many users need to assign a static IP for security purposes.
What You’ll Need:
- Internet Connectivity
- Mouse
- Keyboard
- Physical access to your Player
Finding Network Connections
If you need to configure a static IP address, you must first find the network settings.
Connecting to your Network
- First, please connect a USB mouse & keyboard to your display device.
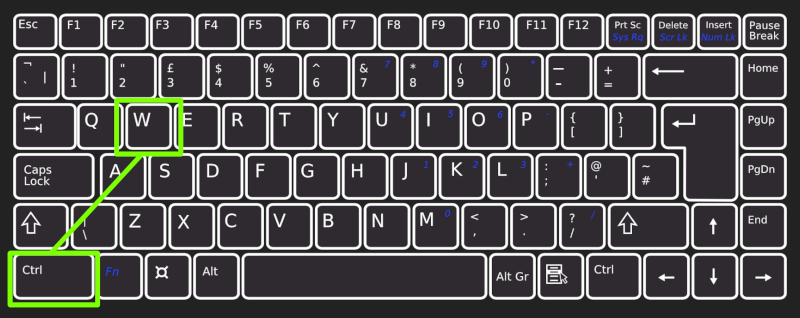
- Press and Hold CTRL + W (this will close the running content).
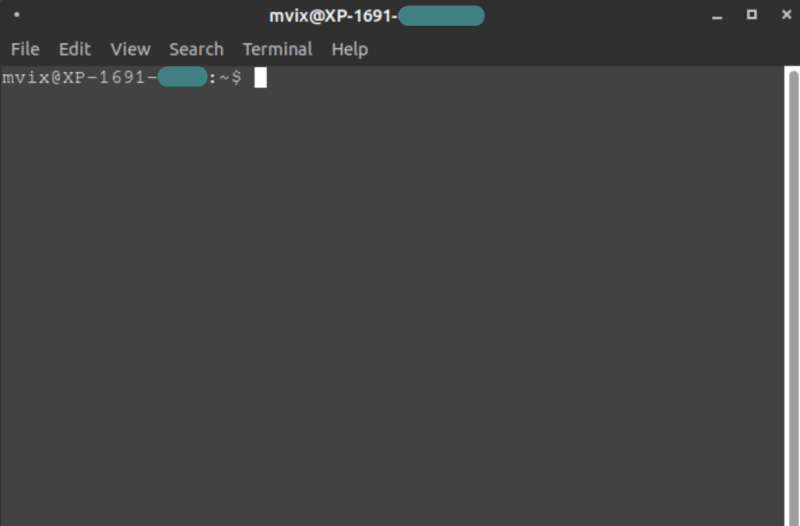
- Press and Hold CTRL + ALT + T (this will open a terminal window).

- Type dsv3-stop and press ENTER.
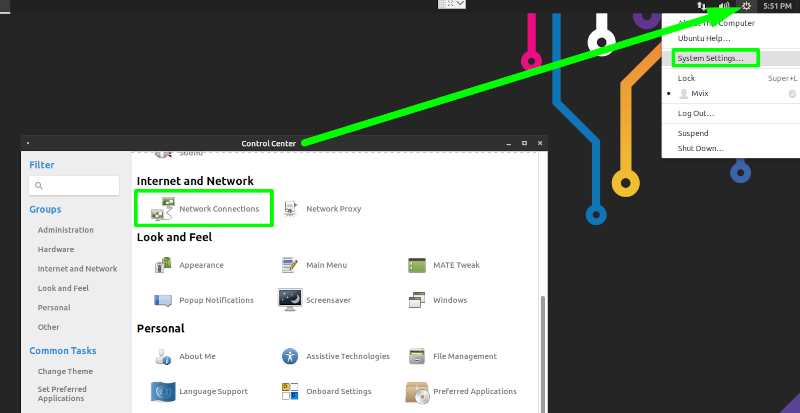
Network Options
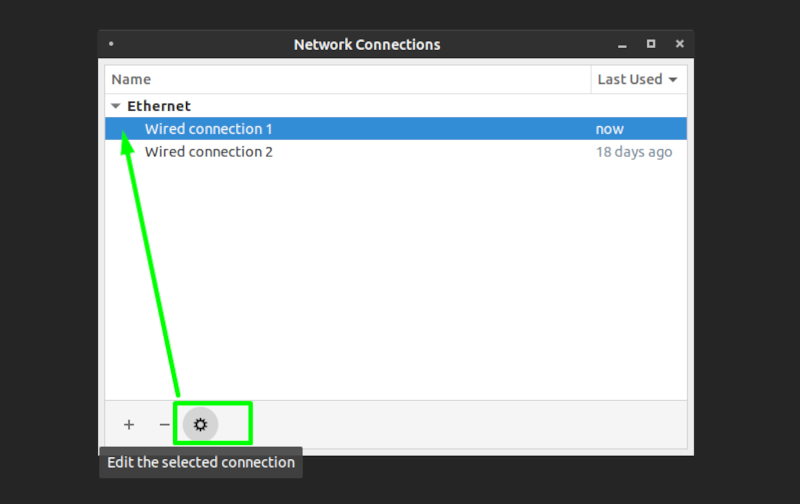
- Click on “Wired” or the name of the wireless network you desire to connect to, depending on whether or not you are using a wired connection.
- Click on the “Options” button.
Selecting IPv4 Settings
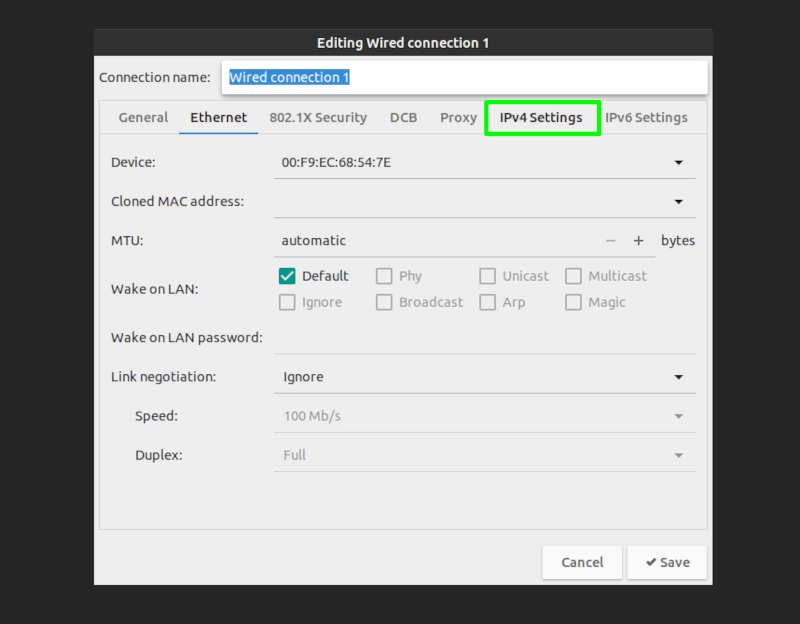
- A new window will appear with the options for your connection. Select the “IPv4 Settings” tab.
Editing IPv4 Settings
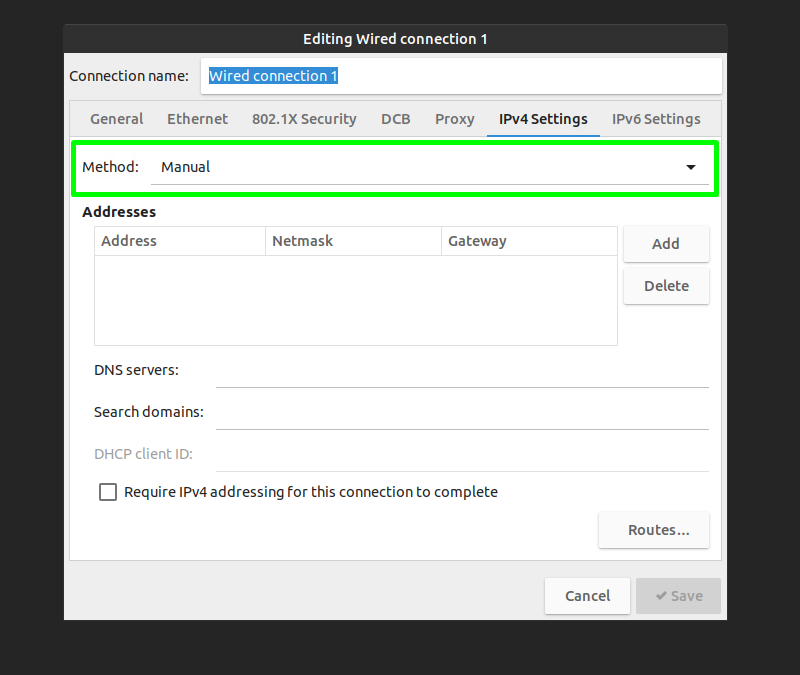
- Select the “Manual” option from the “Method” drop-down menu.
Adding Static IP
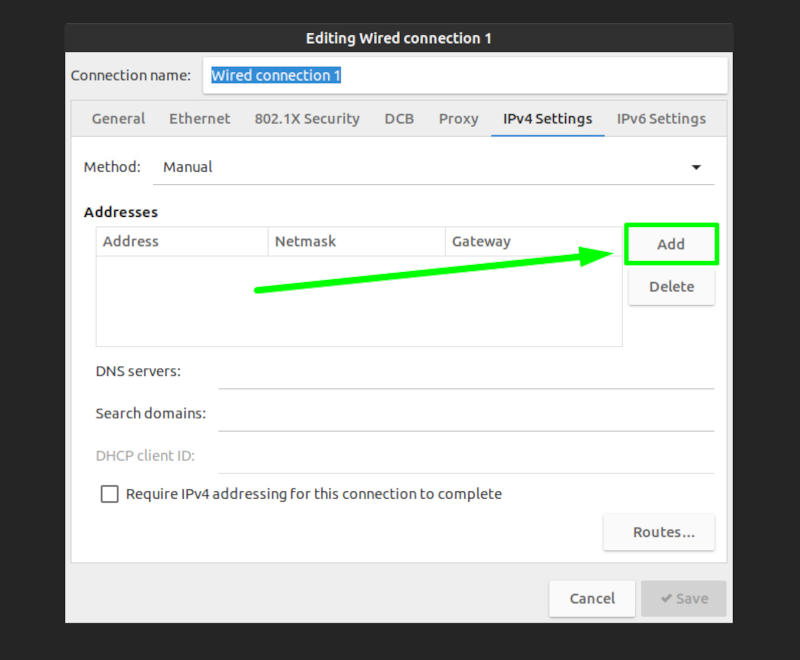
- To configure a Static IP Address for your device, click the “Add” button to the right of the “Addresses” header.
Editing the IP Addresses

- An editable row in the “Addresses” table should have been added.
- Enter your desired IP Address, Subnet Mask, and Default Gateway under the appropriate columns.
- Enter your custom DNS server in the “Additional DNS Servers” text box, if applicable. If there is no custom DNS server, leave it blank.
- Click the “Save” button to save your changes.
 Problems, Questions, Corrections: If you have any further questions, problems, or corrections you would like to see made, please open a support ticket.
