After gathering your content or creating a playlist, you can now combine these files to create a template. Templates allow you to take advantage of multizone functionality by creating independent zones that can hold a variety of content, such as clocks, web applications, webpages, playlists, and singular media files. Once they’re made, there is a template editor that allows you to edit or change current templates.
What You’ll Need
- A compatible digital signage player e.g. Mvix, BrightSign, etc.
- Mvix CMS Software with a supported feature package to use the template editor.
- Internet Connectivity
- Media files, playlists, or general content you wish to add to the template.
If you meet the requirements listed above, simply follow the steps below to learn how to create and edit templates within Mvix CMS.
Video Tutorial
 Note: Although you can add new media from the Template Editor, we recommend you have the media already uploaded.
Navigating to the Template Editor
- Hover over the “Templates” tab and click “Create Template”.
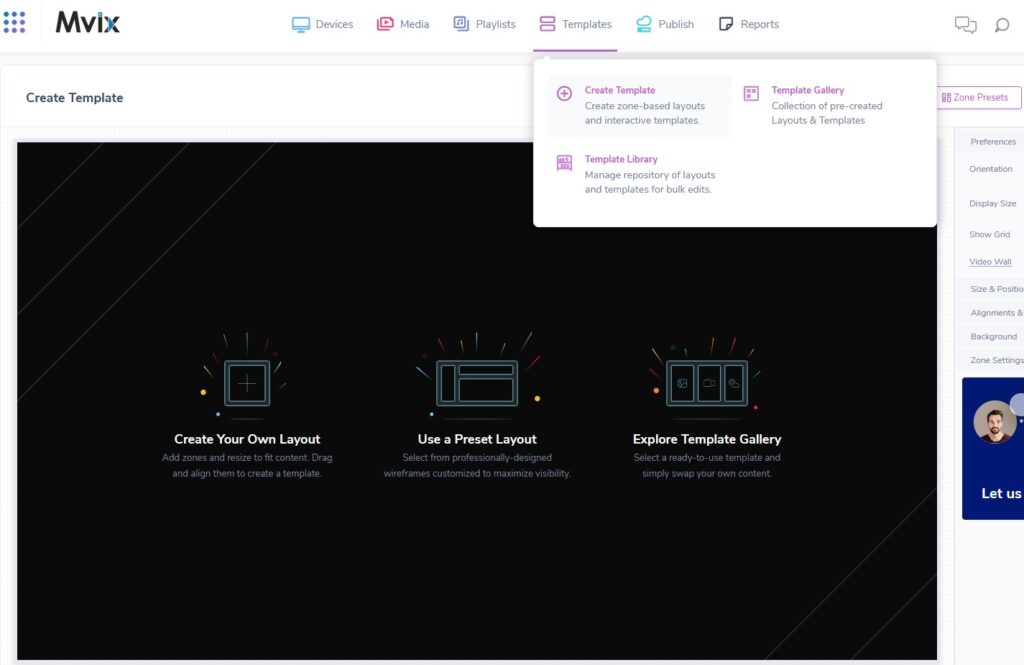
- From the navigation bar, hover over “Templates” and select “Create Template.
- You will see three options in front of you. These are:
- Create Your Own Layout: Start your template from scratch and create a custom design
- Use a Preset Layout: Select from “frames” that you can add your own content to
- (Coming Soon!) Explore Template Gallery: Either use or replace pre-made content from various use cases
Create Your Own Layout
- Click the category and app that corresponds to the media you are looking to display.
- A zone will appear on the canvas. This represents an empty media container that can hold and display any compatible media content.
- If you would like to add multiple zones, simply click an app again and an additional zone will appear.
- NOTE: Newly added zones will always appear in the top left corner, and will need to be dragged to their desired location.
Delete a Zone
- To delete a zone at any time, click to select the desired zone then press the Del key on your keyboard or click the trash can icon at the bottom of the screen.
Resize a Zone
- To resize any zone, click to select the desired zone then click and drag the edges or corners as needed.
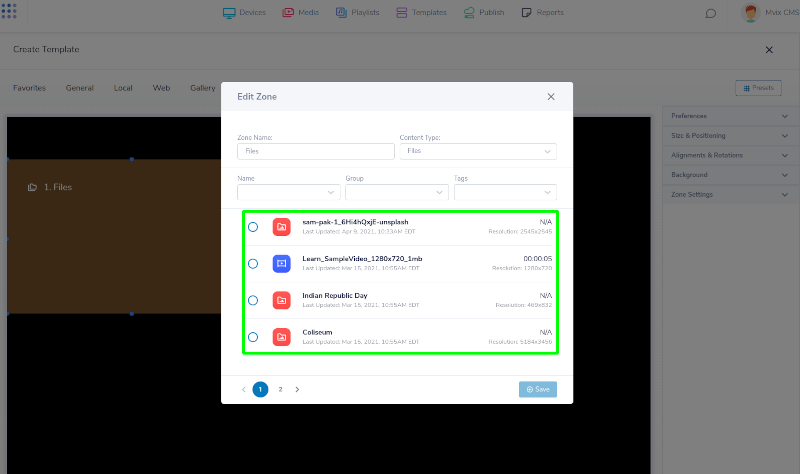
- To specify content for this zone, click the pen icon near the bottom right corner of the zone.
- A window will appear that lists all compatible content for that zone. Click to select the file of your choice and click “SAVE” when done.
Note: Keep note of the zone sizes when you are creating a template. The largest zone should be the focus content.
Adding a Playlist Zone

- Select “Playlist” from the categories and click the Playlist app.
- A new zone will appear in the canvas.
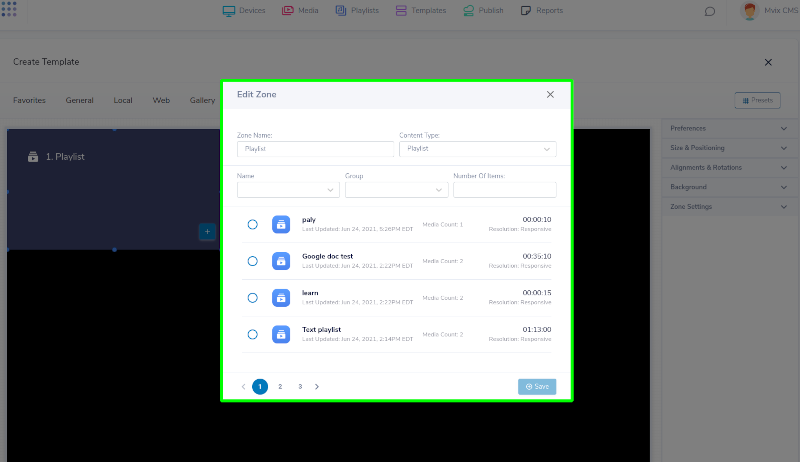
- To create a playlist to your zone, click the “+” icon near the bottom right corner of the zone.
- If you already have a playlist created, click the “Paper Clip” icon to select the one you’d like to show.
- A window will pop up listing all available playlists.
- Click your desired playlist from the list and you’ll see the contents shown on the right.
- Confirm by hitting “SAVE”.
Use A Preset Layout
The Zone Presets features allow for easy template creation by providing ready-made layouts to help easily add content with just a few clicks.
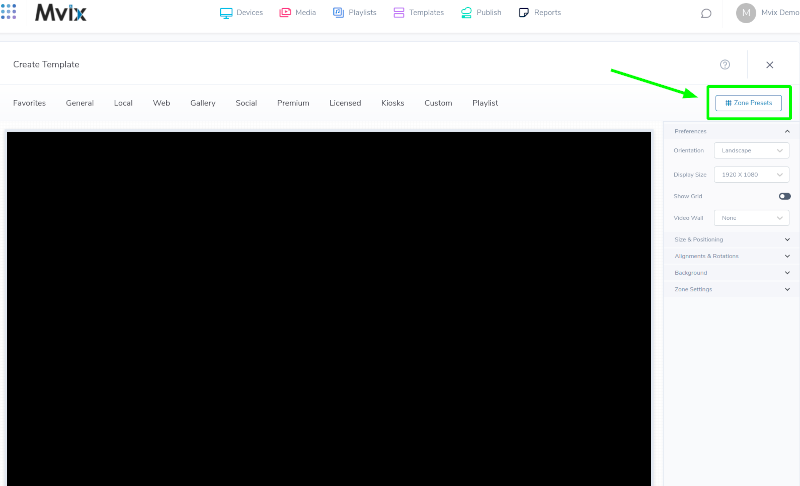
- Click the highlighted Zone Presets button.
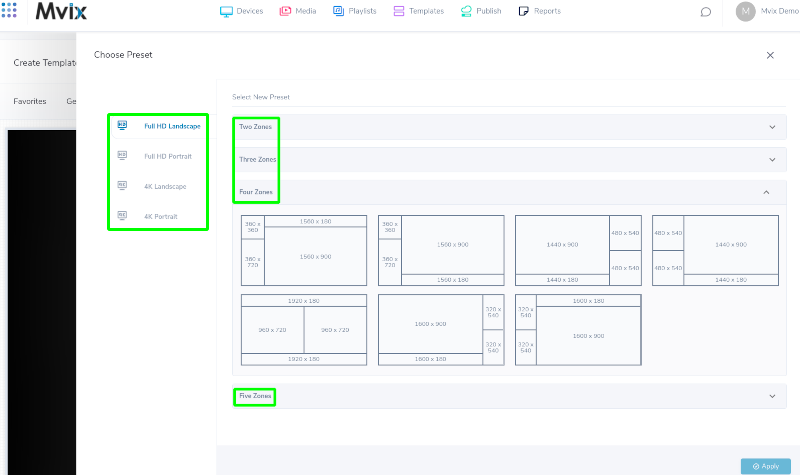
- There are different presets available depending on the orientation & resolution. Simply click on your selected template, then click Apply.
Note: Too many zones can sometimes be a detriment depending on your audience. Displays with longer watch times can have much more content than shorter ones.
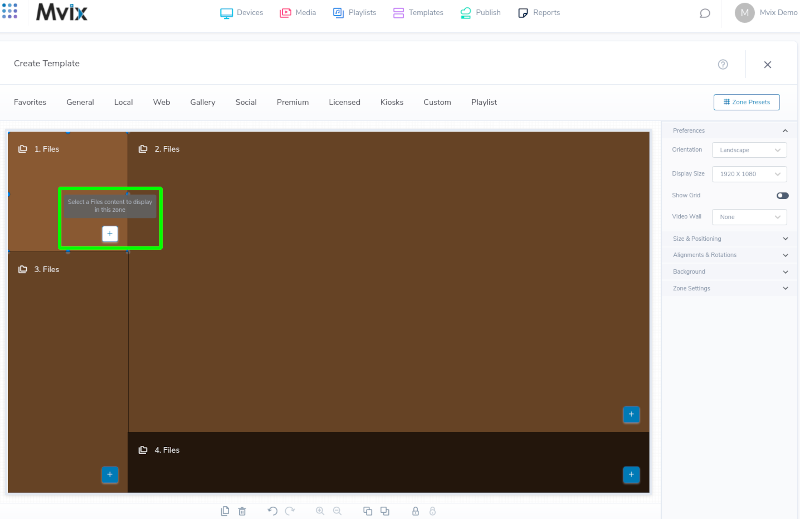
- Click the plus sign ( + ) in the highlighted box above to add new content to any desired zone, then Save the template.
- Click on the “Paper Clip” symbol to attach previously uploaded media to the zone.
- Once the template has been saved, you can proceed to schedule it on any of your desired devices.
Additional Template Editor Tips
- The template editor allows you to change the background image of the template. Select the “Background”, located below the Presets button on the right side of the template window. Please note that the background you select does not count as a zone.
- When configuring a template for a Videowall, hover over the options menu (gear icon on the left side of the template menu bar) and select the “Videowall Layout” option to convert the template to a Videowall template.
- You can also use the Preferences menu to change screen orientation for your template and manage the resolution of your displays when showing the template.
What Zone Sizes are Supported for Responsive Content?

To ensure that Themes are fully responsive, any Themes in a Content app must be added to a zone in a template and resized to display in any of the following 18 sizes, as described below.
- Add the desired content app to the template and a zone will appear.
- Click on the newly added zone, then click Size & Positioning under the provided settings in the right pane of the screen.
- Adjust the width and height accordingly based on the recommended sizes below.
Horizontal Zone Layouts
- 1920×1080
- 1920×720
- 1920×360
- 1920×180
- 1440×1080
- 1440×720
- 1440×360
- 1080×720
- 1080×180
- 720×540
- 720×360
- 720×180
Vertical Zone Layouts
- 1080×1920
- 540×1920
- 480×1080
- 360×540
Square Zone Layouts
- 1080×1080
- 360×360
Hiding Content Apps
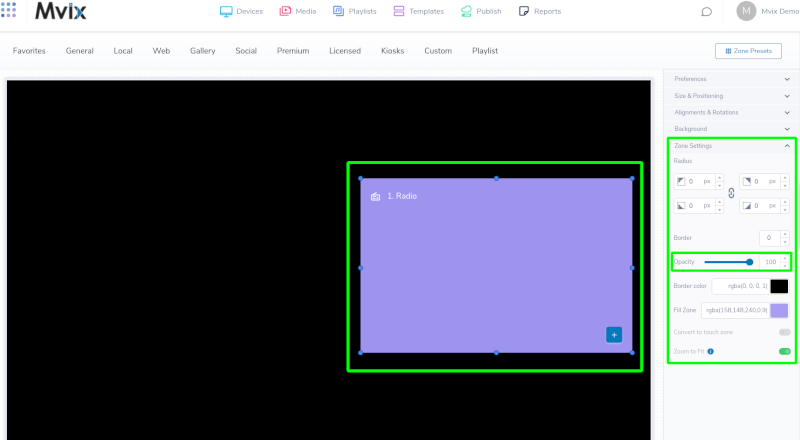
The opacity level can be adjusted through the Zone settings in case you want to hide a content app, such as the Radio Content app. This will allow the Radio zone to be hidden from the screen while still playing audio.
- Click on the zone content app you need to adjust the opacity level.
- Click Zone Settings in the right panel, then use the opacity level to adjust the zone’s opacity to the preferred level.
Problems, Questions, Corrections: If you have any further questions, problems, or corrections you would like to see made, please open a support ticket.
