To get the most out of your Mvix System, you should always have an active schedule playing on your devices. However, in case their are no active schedules running, your failover schedule will begin instead.
But what if you never set up a failover schedule or it is no longer active as well?
As a final failsafe, your Mvix Player will display your “Default Screen” to ensure there is some content showing on your TV. In this article, we’ll explain how you can locate and change this option while providing helpful tips to get the most out of this feature.
 Important Note: The default screen you choose will cover all players within your network.
What You’ll Need
- Mvix CMS Software with a supported feature package
- Internet Connectivity
- Your company’s logo (recommended)
How to Locate & Change The Default Screen
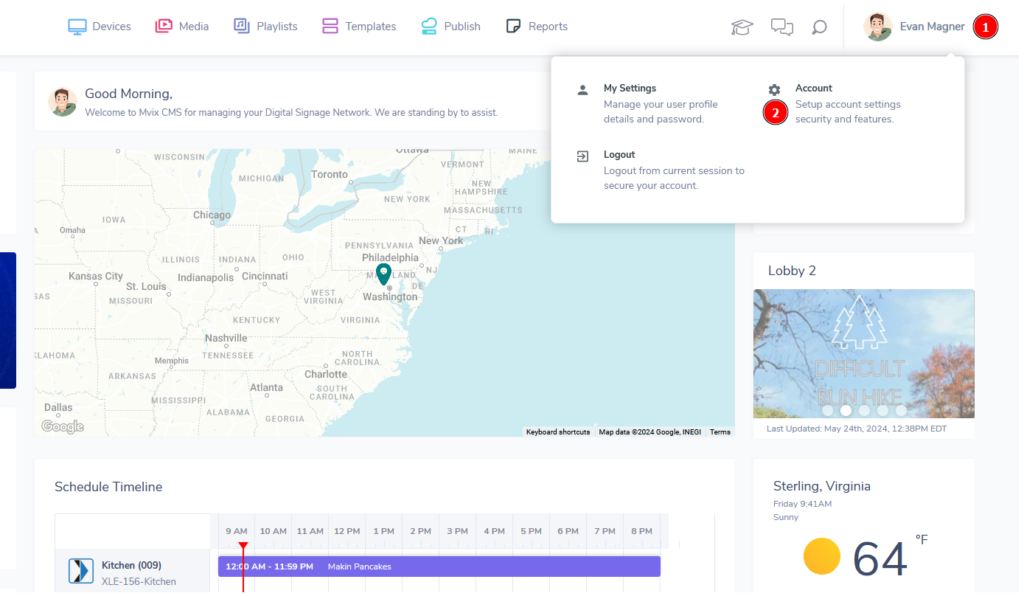
- From the dashboard, (1) hover over your name and (2) select “Account”.

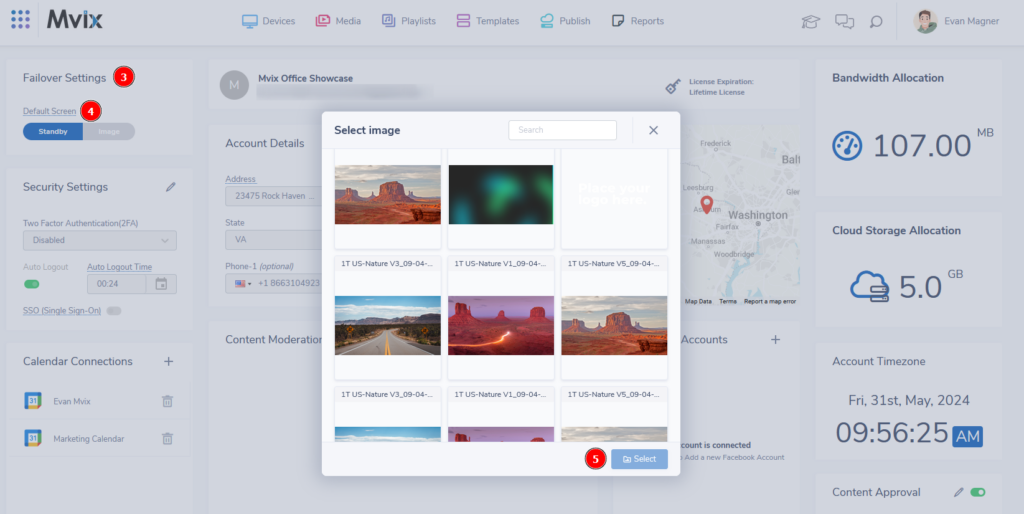
- At the top left of your account screen, you’ll see a (3) block labeled “Failover Settings”. This includes two options for your (4) Default Screen: “Standby” & “Image”
- Standby: This screen is the default on all new accounts and is a black screen with the Mvix logo & clock at the bottom corners.
- Image: Image lets you select an image from your file library to display at the Default Screen. This will be placed over a black background and will include the Mvix logo & clock at the bottom corners.
- If you select image, the following popup will appear. Choose the image from your media library you would like to use then (5) click “Select” to set it as your Default Screen.
 Tip: If you’d like to use your own image, our recommendation is to utilize a version of your logo that works on a black background. This will allow your logo to show front and center. This also allows the image to be viewed well in both portrait & landscape devices on your account.

 Problems, Questions, Corrections: If you have any further questions, problems, or corrections you would like to see made, please open a support ticket.
