Tableau is a popular business intelligence software that helps companies view and analyze large sets of data.
By placing your Views on a digital display, you’ll be able to provide your team with a consistent outlook of critical data without the need to login to the website.
What You’ll Need
- Mvix Select Suite Package
- Internet Connectivity
- A Tableau Account
Important Note: You will need to add a new site to your account instead of using the default home server address. The user logging onto Mvix CMS will also need administrator permissions on Tableau.
Logging Into Tableau On Mvix CMS
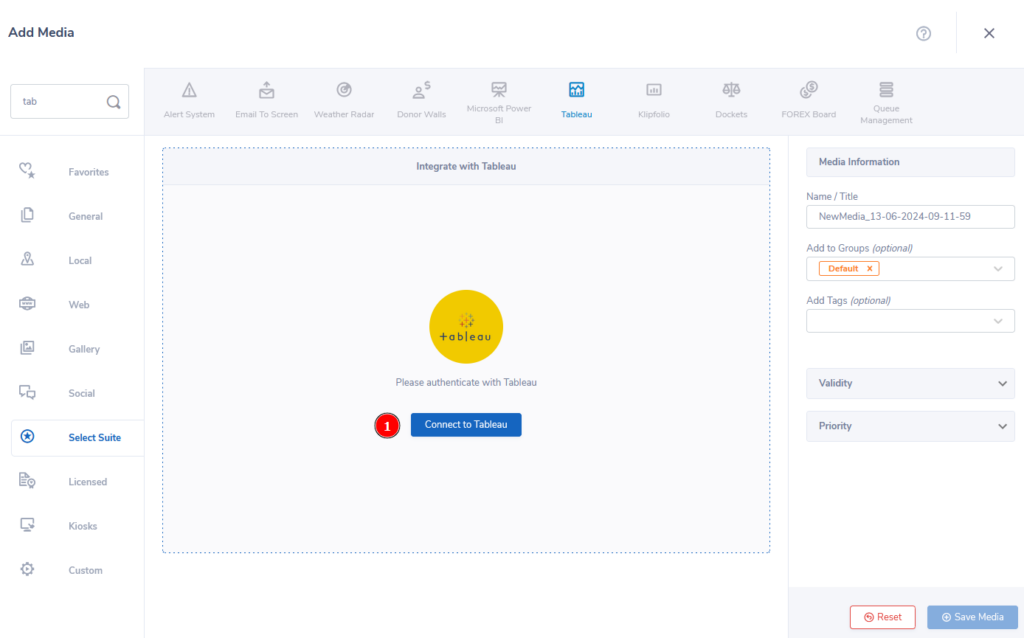
- Access the Add Media Module on the Mvix CMS. From the “Select Suite” category, you’ll find the Tableau App. Click on that and the CMS will show the below screen. (1) Click on “Connect to Tableau” to enter the login section.

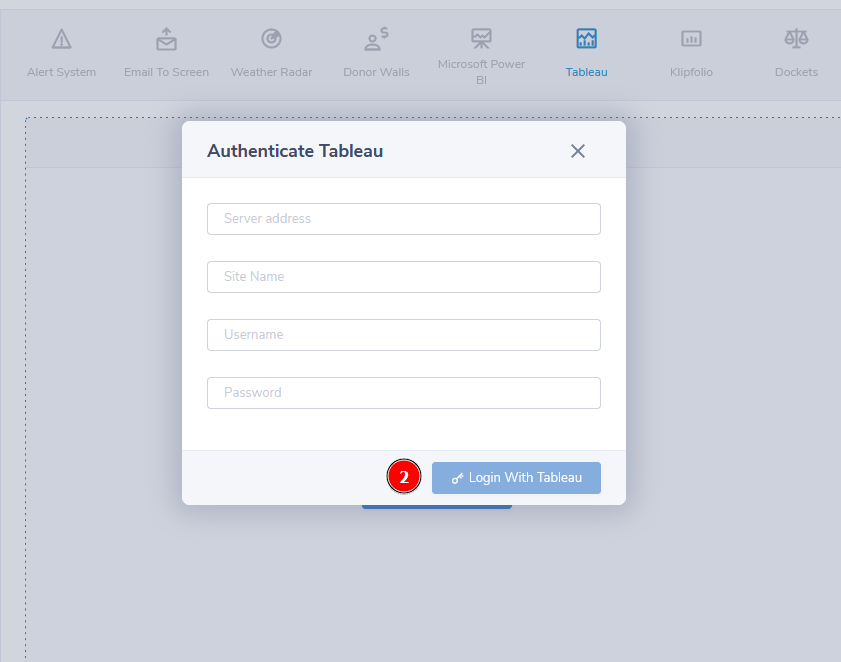
- An authentication popup will appear asking for your:
- Server Address (You will need to omit “https:// or http://”)
- Site Name (which will need to be set up on Tableau)
- Username
- Password
- Enter the relevant information then (2) click “Login With Tableau” to connect your account to Mvix CMS.

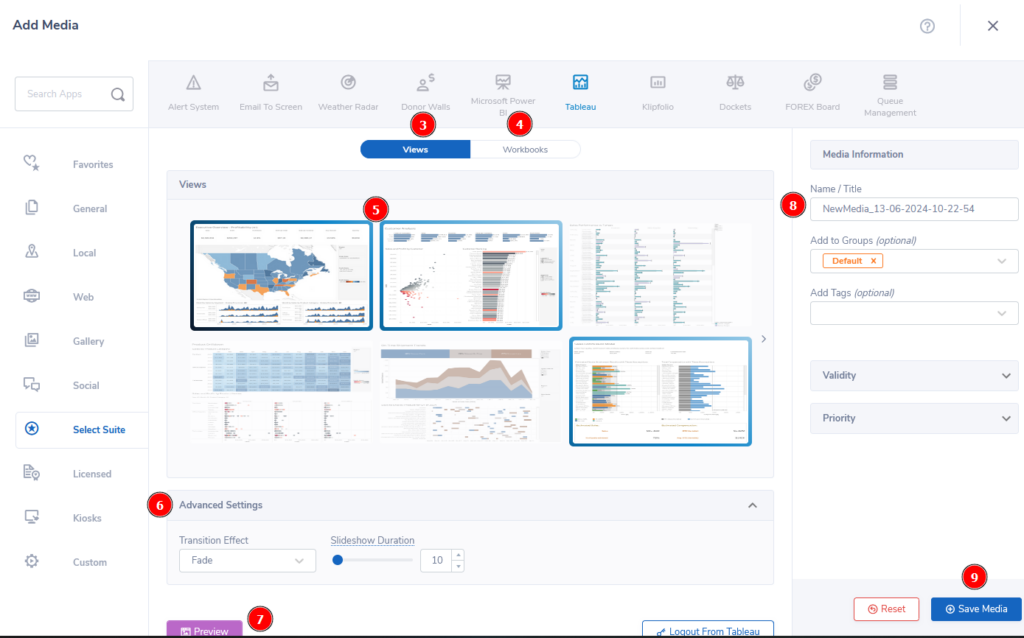
- Once connected, you’ll be presented with your (3) “Views” and (4) “Workbooks” that are on your Tableau account.
- Mvix CMS allows you to showcase either one or multiple views & workbooks in a slideshow. Simply (5) click on the ones you would like to be included and you will see a border appear on the chosen selections.
- If you select multiple views/workbooks, the (6) Advanced Settings section will appear. This lets you choose the Transition Effect and the Slideshow Duration (in seconds) between the slides.
- If you would like to preview your current selection, (7) click “Preview” on the bottom left.
- Then, (8) name your media something easy to remember and (9) click “Save Media” to add this to your Media Library.

 Problems, Questions, Corrections: If you have any further questions, problems, or corrections you would like to see made, please open a support ticket.
