One of the most challenging aspects of managing larger digital signage networks is scheduling content to multiple devices within one location.
With Mvix CMS, clients have the option to segment multiple devices on their device by using tags, locations or groups. During the scheduling part of the process, this means that clients can take out the manual clicking of multiple devices and only select which segment should be updated.
This workflow is highly recommended if your organization has content that can be distributed widely without needing customization or a long and manual process of clicking multiple devices.
What You’ll Need
- An Active Mvix Account
- Internet Connectivity
Getting Started
As mentioned above, there are three types of groupings:
- Tags – Manually tag devices directly so they are part of the same groups
- Locations – Publish to a pre-specified location set up in your device library
- Groups – Similar to tags, groups is another way to segment based on categories
We’ll start with showing how each solution is set up, then show you how publishing via these options is handled.
Device Tag/Groups Setup
As tags & groups have a very similar setup, we’ll be combining the two into this section.
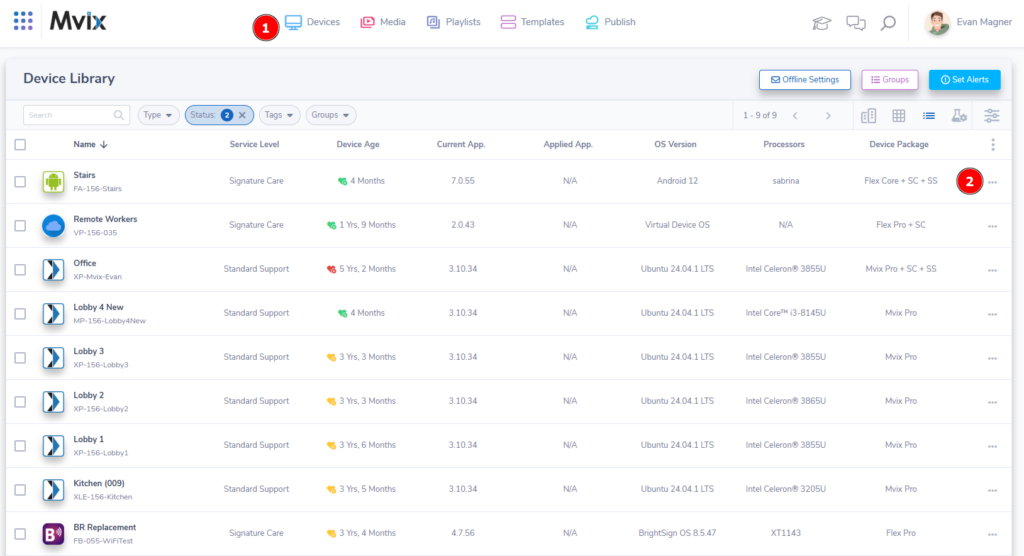
- First (1) hover over the “Devices” module and select “Device Library”.
- From here, find the devices you would like to edit by (2) hovering over the three dots to the right and selecting “Edit”.
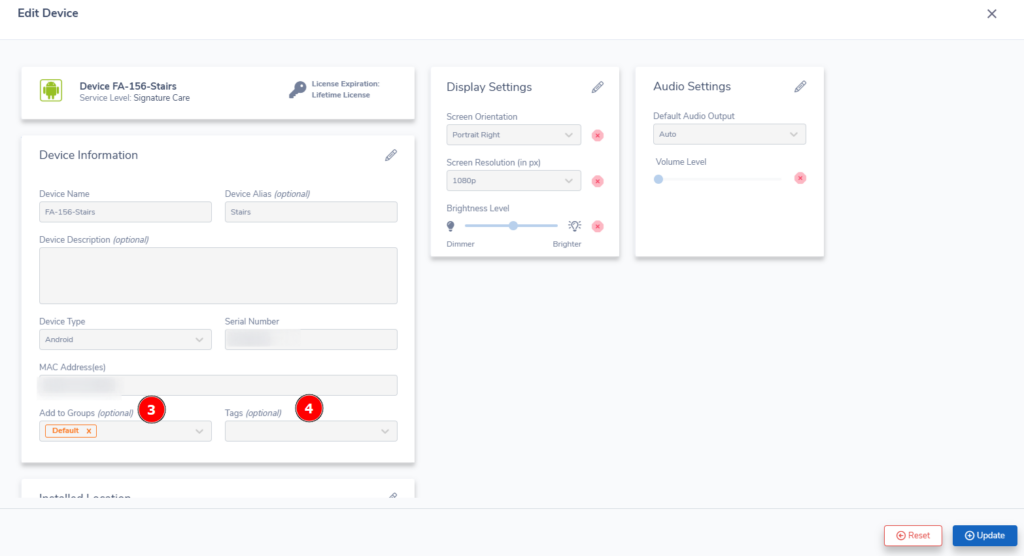
- This will bring up the above “Edit Device” screen.
- From here, you have two options:
- (3) Adding the device to a group
- (4) Adding a tag to the device
- At their core, the two options are very similar workflows. However, tags can sometimes be used for custom parameters. As such, we recommend utilizing groups as the primary option between the two.
Location Setup
The other option is Locations. This requires a bit more setup as you will be completely managing your devices based on a hierarchy of location data.
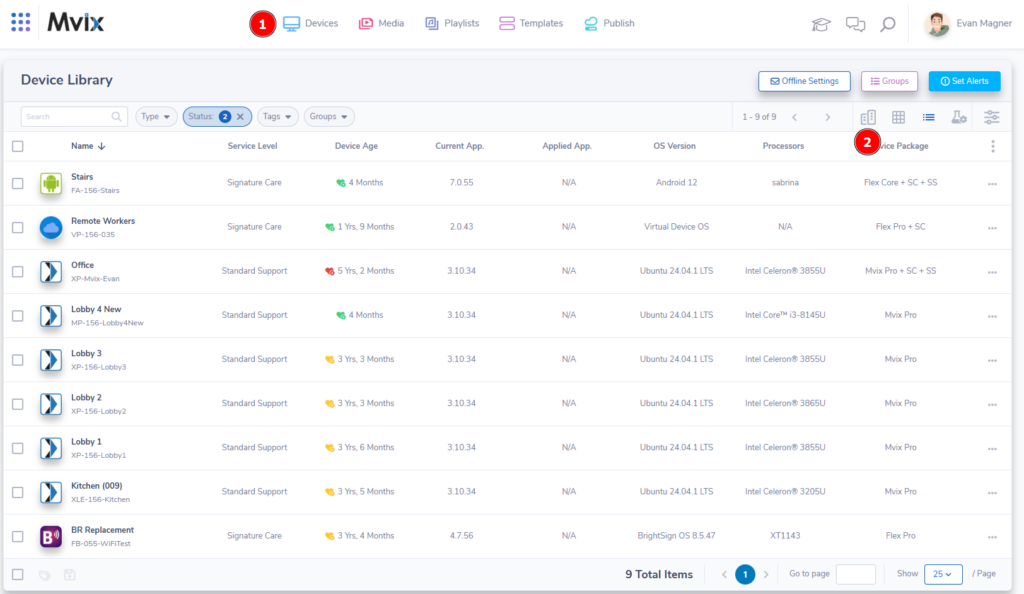
- First, you’ll want to (1) hover over the “Devices” module and click “Device Library”.
- Then, (2) click on the “Location View” button (has two buildings) to open that specific viewport.
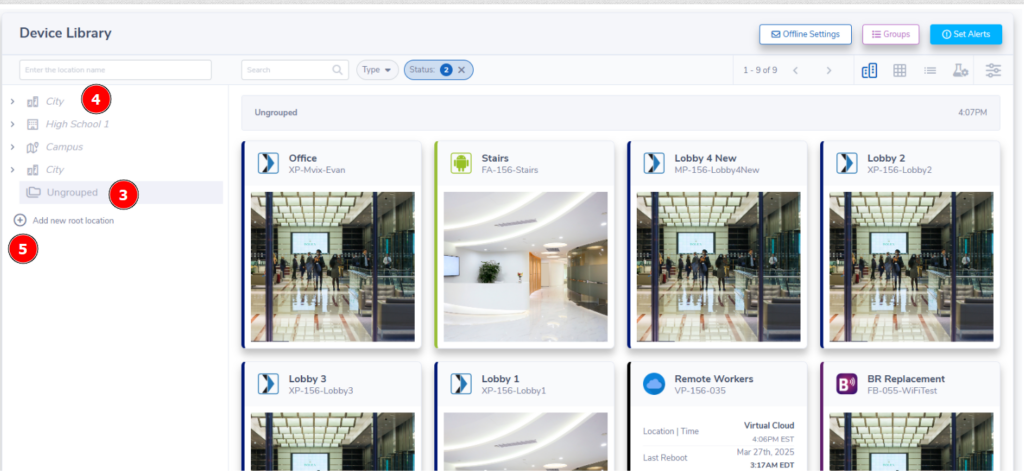
- During your first setup, all devices will be under (3) “Ungrouped”.
- The options (4) above are examples to show how you could set up your location hierarchy. Feel free to brows by clicking the arrows beside.
- Once you’re ready to begin, (5) click the plus symbol to “Add new root location”.
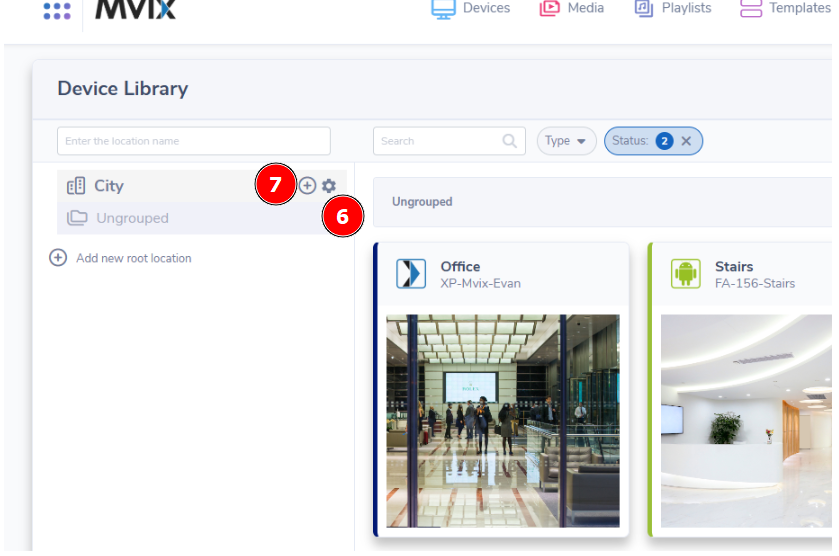
- This will add the root location named “City”.
- We recommend editing the location first to the main business name or account. (6) Click the gear symbol to the right of the location, add a name, time-zone, description, or change the icon/color then click “Save”.
- To add sub-locations, (7) click on the “+” symbol. This will add new locations one grouping down from the location you clicked.
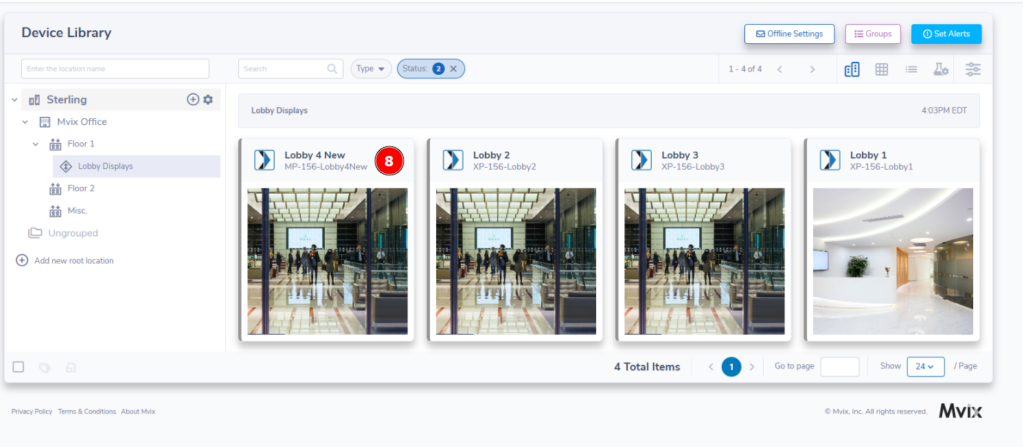
- Once you set up the location, you can now begin adding devices to the locations.
- To add devices to locations, you’ll want to (8) click on the chosen device and drag onto a specific location. If you accidentally add to the wrong one, simply click and drag as many times as you need.
- Once your locations are set up, they’ll be automatically added as a publishing option.
Publish Based On Tags/Groups/Locations
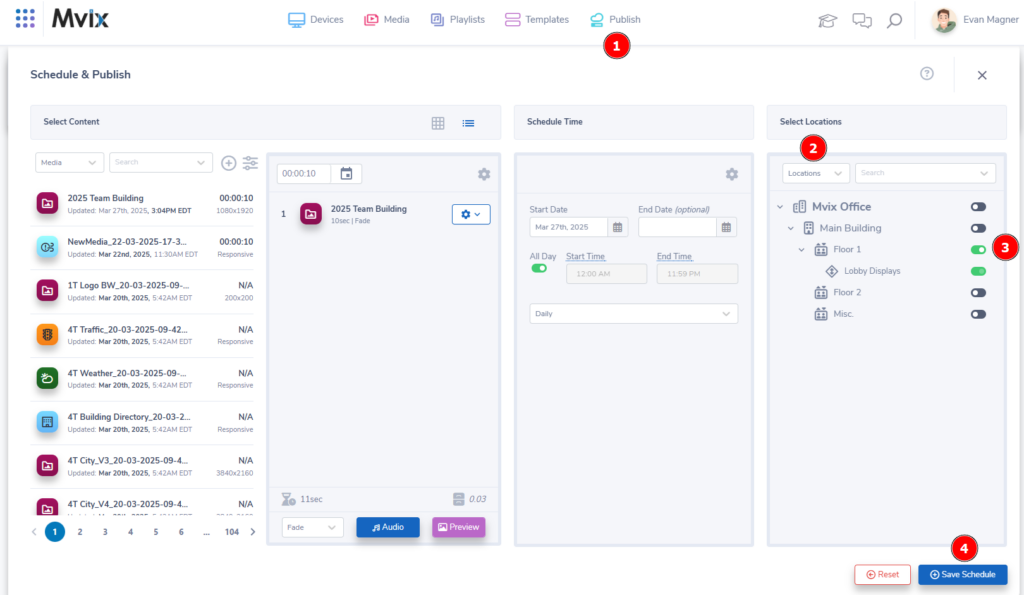
- To publish content, (1) hover over the “Publish” module and & click “Schedule & Publish”.
- Set up the content & schedule.
- When you get to the far right module, (2) click the drop down to select the grouping you would like to publish the content to.
- To activate a tag/group/location, simply (3) click the toggle of your desired groupings. Please note that for location, selecting a higher section will auto-select all locations contained.
- When you are complete, simply click “Save Schedule” to publish to your schedule library.
 Problems, Questions, Corrections: If you have any further questions, problems, or corrections you would like to see made, please open a support ticket.
