Wayfinding is essential for helping visitors navigate large facilities with ease, ensuring they find their destinations quickly and efficiently. Interactive wayfinding takes this a step further by providing real-time, touch-enabled maps and directories that enhance the visitor experience while reducing confusion and frustration.
For Select Suite users of Mvix CMS, you will have access to our Interactive Wayfinding Application. This app lets users upload and customize their own maps to display on their interactive displays.
 Please Note: The Interactive Wayfinding Application is designed for advanced users with both programming expertise and artistic skills in order to fully bring out the application’s potential.
What You’ll Need
- An active Select Suite plan
- Internet Connectivity
- A pre-built map of your building
Getting Started
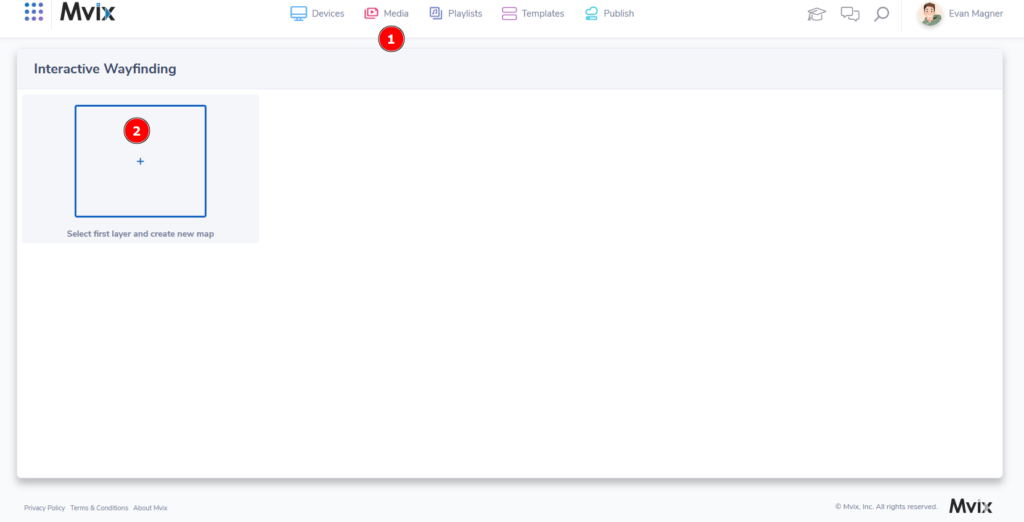
- From the (1) “Add Media” module, click on “Interactive Wayfinding” to access the module.
- You will then see the above screen. To begin, (2) click on the create new map icon and then select your prepared design.
Interactive Map Setup

- The interactive wayfinding module is split into the following:
- (1) Locations: Here is where you would place and label entities that are on your map
- (2) Layers: If you have multiple floors, you would label them here
- (3) Directory: Control the directory layout, search filters, groups, and custom filters
- (4) Settings: Control specific settings of your interactive map here
- (5) Appearance: Add primary colors, custom CSS, and location styles
- Once a user toggles the (6) search field, a list of all available entities will be located here for easy browsing.
- If you would like to see how it looks on a smaller or larger screen, simply (7) click on the appropriate icons.
- (8) This is where your final design will be showcased. You can click and drag to browse exactly how a user would on a display.
- To view the directory in full-screen mode, (9) click the diagonal arrows or use the plus and minus symbols to zoom in and out, respectively.
- If you added more layers, they will be located (10) here and should be placed with the highest floor at the top and then descending.
- Your raw map data will be (11) located here. This is the complete code in JSON and we recommend not changing any text here unless you are well versed in coding.
- Lastly, once you’re ready to save, (12) click “Proceed to Save” to add your map to the media library.
Problems, Questions, Corrections: If you have any further questions, problems, or corrections you would like to see made, please open a support ticket.
