In this article, you will learn how to mount your Mvix device. If you’ve purchased a signage kit from Mvix, you’ll also receive a Device Bracket for your Mvix Device. In just a few quick steps, you can learn how to wall mount your device and complete your installation. To mount your device to a wall, simply follow the images below:
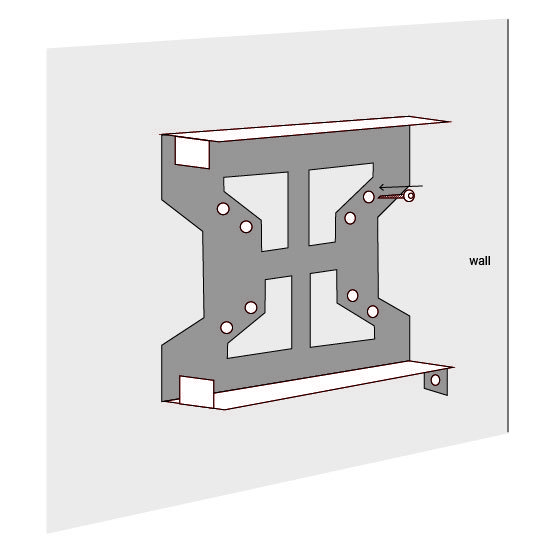
Screwing the Mount
How you screw the wall mount on the way matters. You want to be sure the mount is installed level so that it is not leaning one way or the other.
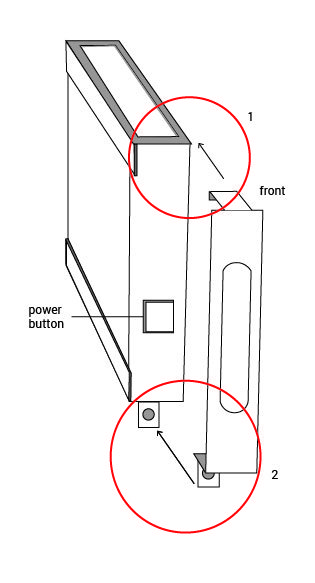
Inserting the Device Into the Bracket
Once the bracket is installed onto the wall, you can place your device into the bracket. The illustration shows you which way the device should be facing in order to fit into the bracket correctly.

Securing the Device to the Bracket
Once you are sure the device fits properly inside the bracket, you can secure it. The illustration below shows you how best to do this.
If you are unsure of the correct process to follow, we suggest getting an expert to install your hardware for you.
Best Practices for Mounting Your Device
When mounting your device, here are some best practices:
- The device is recommended to be mounted 2-3 feet to your TV, or, the length of an HDMI cable. Furthermore, your devices should be located in a well-ventilated area to not overheat.
- When deciding on device placement for mounting, ensure your device is accessible for troubleshooting. When requesting help from our Client Success team, you will need access to your hardware and it should be mounted somewhere easy to access if this occurs. Your device should not be mounted on the ceiling or in any unstable, unreachable location.
- Additionally for support purposes, ensure that your device is easily accessible to plug in a USB and a mouse.
- The recommended proximity for mounting your devices from your Wi-Fi router is 30-40 feet. This ensures that your devices do not lose connectivity.
- For additional mounting questions, please contact our Client Success team.
 Problems, Questions, Corrections: If you have any further questions, problems, or corrections you would like to see made, please open a support ticket.