The tagging function in Mvix CMS was designed to improve search results and make searching for your media easier. In other words, media can be found by using any number of words associated with that content.
Users can filter their media library to show only those files that have been tagged with that term, or multiple terms if desired. This method of categorizing is very similar to Groups, except that more than one tag can be applied to a file.
Applying Tags to New Media
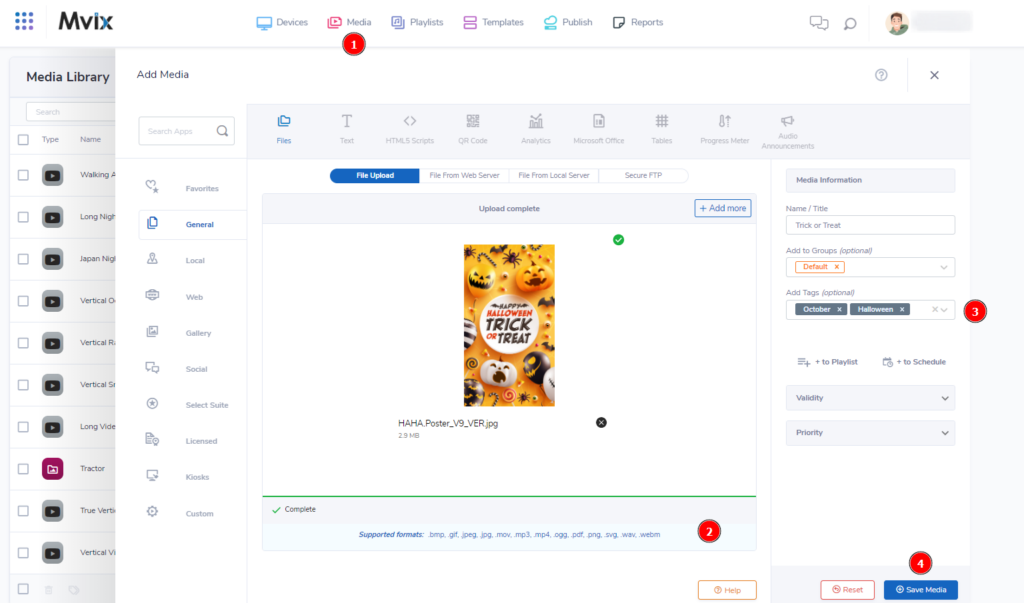
- Tags can first be applied when uploading media. To start, (1) hover over the “Media” tab and click “Add Media”.
- Next, (2) upload your desired content.
- Once you’ve uploaded your content, you’ll be able to edit the (3) “Add Tags” box on the right side of the module.
- You can either select/search for a tag you’ve previously added to your account, or you can type a new tag and click enter to add it to the database.
- Once you’ve added your tags, click “Save Media” to add the media to your library.
 Note: When uploading multiple files at once, the tags will be applied to every file you are uploading. To add to only certain files, you’ll need to either upload just those at the time, or edit the tags manually in the media library.
Adding Tags To Existing Media
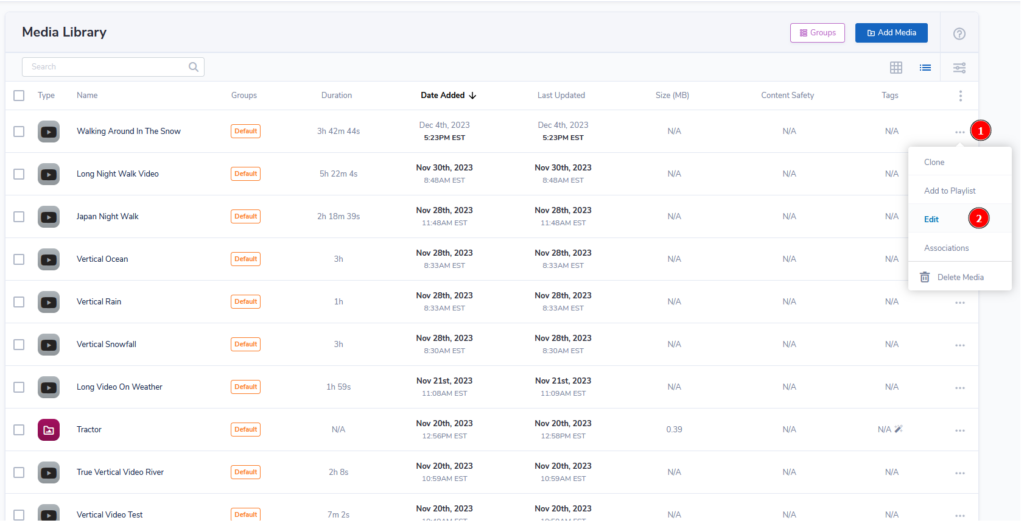
- From the media library (located under the “Media” module), find the media you would like to edit and then (1) click on the three dots to the far right.
- Click on (2) “Edit” to be brought to the “Add Media” module. (This is the same screen as earlier in this article).
- Next, follow steps three to five in the “Applying Tags to New Media” section above).
Viewing Your Tags
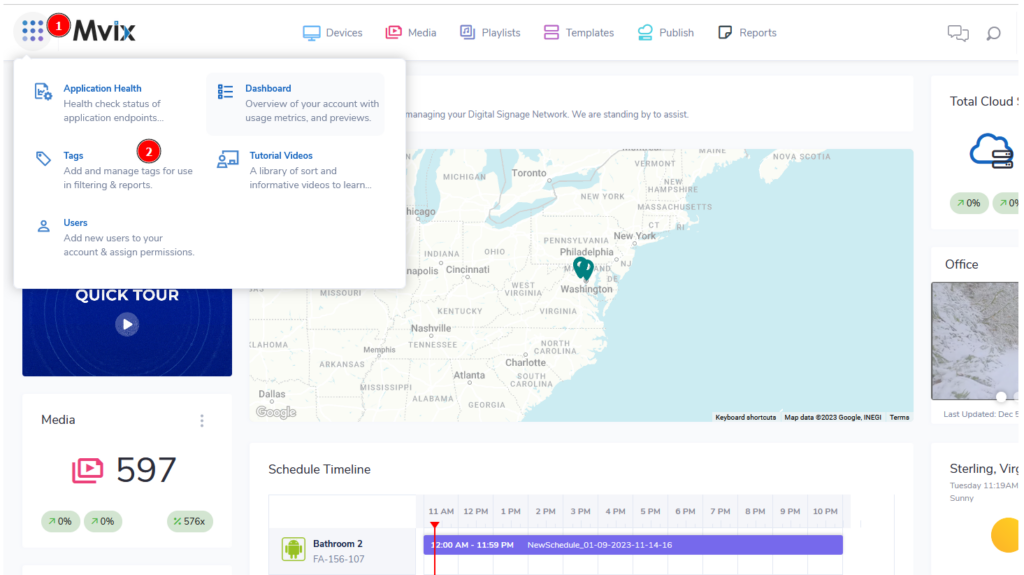
- To view your current tags, (1) click on the 9 dots to the top-left of the Mvix CMS then click on (2) “Tags”.
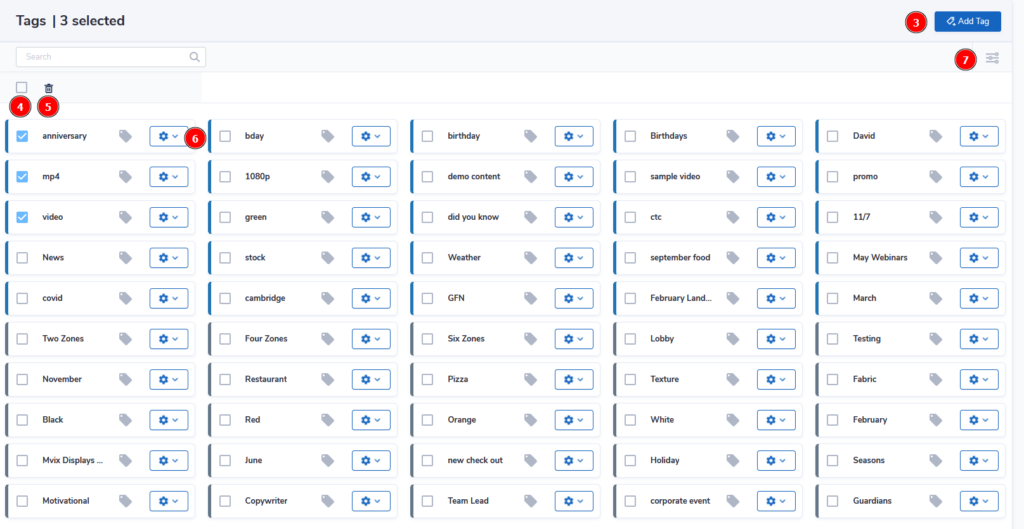
- This will bring you to the Tags module. From here you have multiple controls.
- You can either (3) add a new tag, (4) bulk select all tags on the page, and (5) delete any of your selected tags.
- The (5) search function will help if you are looking for either a specific tag or would like to show tags based on the main module it is in (e.g. User Tags, Media Tags, etc.).
- Lastly, (6) you can edit or delete a single tag by clicking the corresponding gear icon.
Tags are an important way to help keep your CMS organized and efficient. We recommend putting tags on all media that will be used multiple times as this will help reduce time spent searching through your media library.
Problems, Questions, Corrections: If you have any further questions, problems, or corrections you would like to see made, please open a support ticket.
